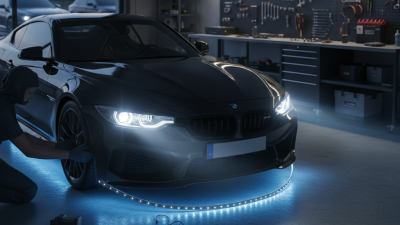
Choosing the right Led Off Road Lights in 2026 requires more than comparing brightness numbers. Global buyers need dependable performance across deserts, forests, farms, construction sites, and long-distance trails. This guide introduces leading lighting options through practical criteria, including beam pattern, measured output, heat control, waterproofing, mounting strength, and power efficiency. A bright lamp is not always the best lamp. Beam control matters.
Real roads disagree.
The evaluation should also consider real user experience, manufacturer testing, product documentation, and after-sales support. Buyers can examine IP ratings, vibration resistance, operating temperatures, warranty terms, and replacement-part availability before placing an international order. Independent test results are valuable, but published claims still require careful verification. Some brands report theoretical lumens rather than usable roadway illumination. That difference can become obvious when dust, rain, or snow reduces visibility. Details matter.
This overview will compare popular 2026 models for different vehicles and working conditions, from compact utility trucks to heavy expedition rigs. It will also discuss installation depth, wiring quality, relay protection, and compatibility with 12-volt or 24-volt systems. Regional regulations and road-use requirements can vary, so buyers should confirm local compliance before installation. No single product suits every driver. A supposedly perfect choice may disappoint when its narrow beam leaves dark areas beside the trail. That limitation deserves honest attention. Claims need evidence. Reliable purchasing decisions come from balancing tested performance, durability, support, and total ownership cost rather than chasing the highest advertised lumen figure.
A high-performance LED off-road light is more than a bright number on a product sheet. Real performance depends on beam control, thermal stability, vibration resistance, and dependable wiring. A focused spot beam helps drivers see distant trails, while a wider flood pattern reveals rocks, branches, and sharp turns nearby. The best designs balance both. Excessive brightness can create glare and reduce visibility in dust, rain, or fog. That detail is often overlooked.
Heat management matters during long climbs and slow technical driving. Quality lights use strong housings, efficient heat sinks, and tested thermal protection. An IP-rated enclosure helps resist water and dust, but sealing quality can weaken after poor installation. Look for impact-tested construction, corrosion-resistant hardware, and connectors that remain secure under vibration. Color temperature also deserves attention. Very cool white light may look powerful, yet warmer output can improve contrast in wet conditions.
Tips: Compare beam patterns, not only advertised lumens. Check measured output after twenty minutes of operation. Confirm the vehicle’s electrical capacity and use properly protected wiring. Test the light at night before remote travel. Small mistakes matter.
Independent testing should cover temperature, voltage changes, repeated impacts, and moisture exposure. Buyers should request clear specifications and realistic performance data. Some manufacturers still publish peak output instead of sustained output, which can mislead even experienced customers. A careful decision leaves room for doubt. That is healthier than trusting a perfect-looking specification sheet.
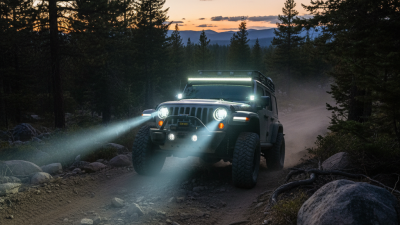
LED off-road lights differ mainly by beam pattern, housing design, and intended use. Spot beams project a narrow, long-distance path across open desert roads. Flood beams spread light widely, helping drivers see rocks, branches, and trail edges. Combo lights blend both patterns for mixed terrain, although their coverage is rarely perfect.
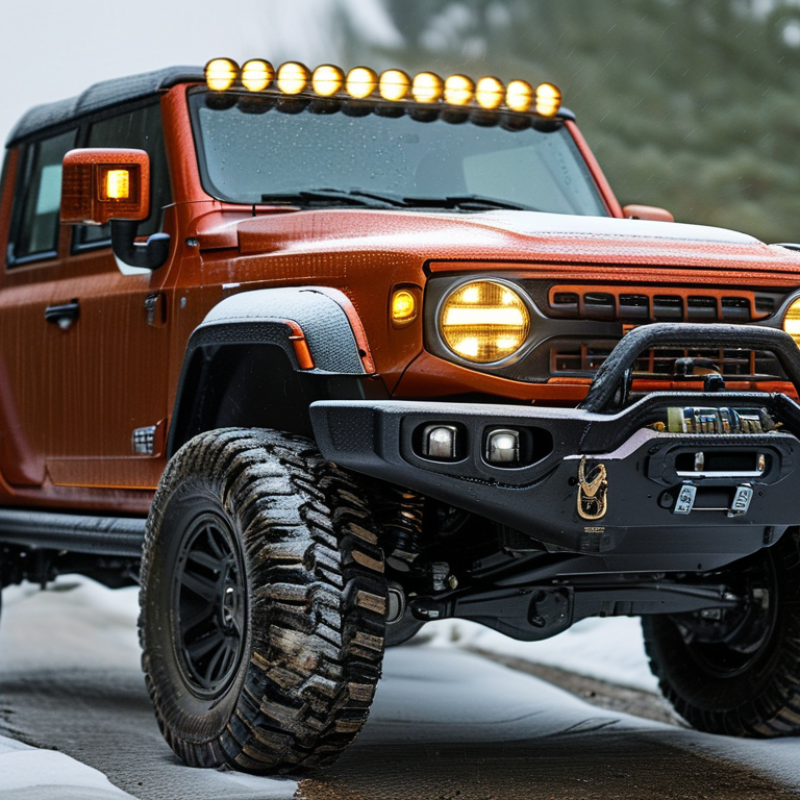
LED light bars suit vehicles needing broad forward illumination. Compact pod lights work well on bumpers, roof corners, or motorcycle brackets. Work lights are useful around campsites, recovery areas, and agricultural vehicles. Amber lighting can reduce glare in dust, rain, or light fog, but local road-use rules must be checked before installation. Always confirm voltage, weather resistance, heat control, and mounting strength. A bright lamp is not automatically a safe lamp.
Tips: Match the beam to your terrain. Measure the mounting space first. Use sealed connectors and a properly rated fuse. Aim lights below eye level on public-access roads. Test vibration after installation. I have seen strong lights perform poorly because brackets loosened. That small detail matters. Buyers should also review regional certification requirements and replacement-part availability. Product descriptions can sound precise, yet real performance changes with lens quality, wiring, temperature, and vehicle speed. There is no universal best type. The right choice depends on how, where, and how often the vehicle is used.
For global buyers, the best LED off road light is not always the brightest one. Beam pattern should match the driving task. A narrow spot beam reaches far along desert tracks and open fields. A wide flood beam reveals rocks, branches, and turns near the vehicle. Combo beams can offer both, but poor optics may create distracting hot spots. Beam shape matters.
Brightness needs careful comparison. Advertised lumens often describe theoretical output, not useful road coverage. Check candela, measured lux, and the beam distance at a stated point. A practical test is simple: compare two lights on the same vehicle, at the same height, after dark. Record visibility at 50 and 100 meters. Human eyesight still decides.
Durability depends on more than a sealed housing. Look for strong aluminum construction, stable mounting points, protected wiring, and credible water and dust resistance testing. Repeated vibration can loosen a weak bracket within weeks. Heat also reduces output and service life, so inspect cooling fins and thermal control. Efficiency matters during long trips; compare watts against useful light, not headline brightness. Confirm voltage compatibility before ordering across borders. My own comparison habit has one flaw: I sometimes favor a brighter lamp before checking glare. That mistake can reduce real visibility. Test before ordering.
Choosing 2026 LED off-road lights requires more than checking brightness. Installation, wiring, and local compliance matter just as much. Mount lights securely on a rigid bracket, away from fragile plastic panels. Keep the beam clear of mirrors, cameras, sensors, and moving suspension parts. I once underestimated vibration on a rough trail. The bracket loosened after several hours.
Use a fused relay harness with correctly sized cables. Connect the fuse close to the battery, then protect wires with split conduit. Ground connections should touch clean, unpainted metal. Waterproof connectors help, but they are not magic. Leave enough cable slack for steering and suspension movement. Test the lights with the engine running and inspect for heat, flickering, or voltage loss.
Tips: Check your vehicle manual and transport authority rules before installation. Some countries restrict light color, mounting height, beam direction, or use on public roads. Off-road approval does not automatically mean road approval. Use a separate switch, label the circuit, and keep the original lighting controls unchanged. A professional inspection is sensible when wiring passes near airbags or fuel lines. Regulations differ, and online advice can be outdated. Recheck the rules before every cross-border trip.
| Application / Light Type | Typical Beam and Use | Recommended Output Range | Common Electrical Configuration | Installation Guidance | Weather and Mechanical Protection | Global Legal and Compliance Considerations |
|---|---|---|---|---|---|---|
| LED Light Bar | Long-distance illumination for trails, open terrain, desert driving, and work areas. Combination beams are commonly used when both distance and peripheral coverage are required. | Approximately 60–240 W for common recreational and utility applications. Choose output by terrain rather than by advertised lumen claims alone. | 12 V or 24 V nominal systems; commonly connected through a relay, fuse, switch, and appropriately sized cable. | Use two or more secure mounting points, reinforce thin body panels, protect cable entry points, and leave sufficient clearance from the radiator, hood, windshield, and moving parts. | Prefer an enclosure rated at least IP67 for exposed off-road use. Use corrosion-resistant brackets and check fasteners after initial vibration exposure. | Many auxiliary light bars are intended for off-road use only. Road use may require approved photometric performance, mounting height, switching, and marking under the destination jurisdiction. |
| Round Driving / Spot Lamp | Narrow, concentrated beam for long-range visibility on unlit roads or private land. Best suited to applications where forward distance is more important than side coverage. | Approximately 30–120 W per lamp, depending on lens design and required range. | Usually installed as a matched pair on a 12 V or 24 V vehicle. A dedicated fused circuit is recommended instead of loading a factory lighting circuit. | Aim the lamps on level ground after installation. Use a rigid bracket, locking hardware, and a cable loop that prevents tension at the connector. | IP67 or IP68 protection is suitable for mud, rain, and temporary immersion conditions when the manufacturer specifies it. | Driving lamps used on public roads may need a recognized approval mark and may be restricted to specific operating conditions. Do not assume an off-road lamp is road legal because it is bright or weatherproof. |
| Flood / Work Lamp | Wide, short-to-medium-range illumination for loading, recovery, agricultural work, construction, camping, and low-speed maneuvering. | Approximately 18–80 W per lamp is common for compact work-light installations. | 12 V and 24 V versions are widely used. Use a separate switch or control circuit, especially when the lamp is not part of the road-lighting system. | Mount above or beside the work area without creating glare for the operator. Route wiring away from exhaust components, sharp edges, suspension travel, and water-trap points. | IP65 may be adequate for sheltered installations; IP67 or higher is preferable for exposed vehicle mounting. | Work lamps are commonly restricted to off-road, stationary, or special-purpose use. They should not be wired so that they can unintentionally operate as ordinary road headlamps. |
| Rock Light / Side-Area Lamp | Low-mounted, close-range lighting for wheel wells, steps, equipment, and trail obstacles. Designed for visibility around the vehicle rather than forward road illumination. | Approximately 3–15 W per lamp, with multiple lamps often installed around the vehicle. | Low-current 12 V circuits are typical. Use a fused auxiliary circuit and weather-sealed connectors where lamps are mounted below the body. | Keep lamps clear of tire contact, suspension movement, jacking points, and underbody impact zones. Use protected cable conduit and leave service access for cleaning and replacement. | IP67 or higher is recommended because these lamps are exposed to mud, gravel, and spray. | Colored or decorative exterior lighting may be restricted on public roads. Check local rules on color, flashing patterns, visibility from the front or rear, and underbody lighting. |
| Amber Dust / Warning Lamp | Improves vehicle conspicuity in dust, snow, fog, work zones, or low-visibility operating environments. Amber is often used for warning rather than forward illumination. | Approximately 5–40 W per lamp or module, depending on whether the light is steady or flashing. | 12 V or 24 V systems are common. Flashing functions should use a compliant controller and a separately protected circuit. | Mount where the light remains visible and is not blocked by racks, tools, bodywork, or loads. Avoid placing warning lamps where they can be mistaken for brake, turn, or emergency lamps. | IP65–IP67 is commonly appropriate; use vibration-resistant mounting for roof or roll-cage installations. | Warning colors, flash rates, lamp locations, and permitted users vary substantially by country and vehicle type. Obtain local approval before public-road operation. |
| Low-Profile Grille or Bumper Lamp | Compact auxiliary forward lighting where roof clearance, aerodynamics, or vehicle height is a concern. | Approximately 20–100 W per lamp or module. | 12 V or 24 V nominal input; use a relay-controlled fused feed and a dashboard switch that is clearly identified. | Maintain adequate airflow to cooling systems and avoid blocking sensors, cameras, license plates, or factory lamps. Verify beam aim after bumper flex and final tightening. | IP67 is a practical minimum for exposed bumper locations. Aluminum housings and sealed connectors help reduce corrosion but do not eliminate maintenance requirements. | The position, number, color, height, and beam pattern of front auxiliary lamps may be regulated. Vehicle inspection authorities may reject lamps that create glare or lack required approval markings. |
| Motorcycle / ATV Compact Lamp | Compact forward or side illumination for motorcycles, ATVs, UTVs, and small utility vehicles. | Approximately 10–50 W per lamp, selected according to alternator capacity and available mounting space. | 12 V systems are typical. Confirm the vehicle charging-system capacity and use a fused circuit sized for the actual load. | Use flexible mounting where appropriate, secure connectors against vibration, and allow steering movement without pulling the harness. | IP67 is recommended for exposed powersports use. Inspect brackets, lens condition, connectors, and cable abrasion more frequently than on road vehicles. | Road legality can differ between motorcycles, ATVs, UTVs, and agricultural vehicles. Lamps may need approved beam control, position, and marking before use on public roads. |
| 24 V Heavy-Duty Work Lamp | Suitable for trucks, buses, mining equipment, agricultural machinery, and industrial vehicles using 24 V systems. | Approximately 30–150 W per lamp, depending on duty cycle and required coverage. | Connect to a correctly protected 24 V auxiliary circuit. Do not connect a 12 V-only lamp to 24 V unless its specifications explicitly support the voltage range. | Use heavy-duty brackets, strain relief, abrasion-resistant conduit, and a grounding point rated for the expected current. | For severe-duty service, consider IP67/IP68 protection and vibration testing appropriate to the equipment environment. | Industrial and agricultural exemptions may not apply on public roads. Confirm vehicle-specific lighting rules, inspection requirements, and approval markings in the operating country. |
| Universal Wiring and Fuse Practice | Applies to most auxiliary LED installations, regardless of lamp shape or beam pattern. | Calculate current using: Current (A) = Total electrical power (W) ÷ System voltage (V). Example: a 120 W load on a 12 V system draws about 10 A before charging-voltage variation. | The fuse must protect the cable, and the cable must be selected for current, length, ambient temperature, installation method, and allowable voltage drop. Use a relay when the switch or factory circuit is not rated for the load. | Place the main fuse close to the battery or auxiliary power source. Use sealed connectors, proper crimp tools, grommets through metal panels, and a separate return path or verified chassis ground. | Keep wiring away from heat sources and moving components. Inspect for loosened fasteners, water ingress, insulation damage, and connector corrosion after off-road use. | Electrical installation should comply with applicable vehicle wiring, electromagnetic compatibility, and road-equipment rules. A qualified installer should verify the final circuit and local inspection requirements. |
| Global Road-Legal Checklist | A pre-purchase and pre-installation checklist for buyers operating across different countries or regions. | No single lumen rating determines legality. Approval generally depends on beam pattern, glare control, lamp position, color, switching, markings, and vehicle category. | Confirm voltage compatibility, current draw, fuse protection, relay rating, connector type, and whether the vehicle has a smart charging or multiplexed electrical system. | Keep installation instructions, wiring diagrams, approval documents, and product markings. Check whether the lamp must operate only with high beam, a work circuit, or a warning-light control. | Verify the stated IP rating under IEC 60529 and check whether the lamp has evidence of vibration, water, corrosion, and electromagnetic compatibility testing relevant to the intended vehicle. | Before public-road use, consult the destination country's vehicle authority or inspection agency. Off-road-only equipment may be legal on private land but prohibited, restricted, or subject to approval on public roads. |

Buyer note: Ratings and legal requirements vary by vehicle, installation method, operating environment, and jurisdiction. Verify the latest local regulations and the lamp's technical documentation before installation or public-road use.
Choosing LED off-road lights begins with the vehicle, not the brightest advertised number. A compact SUV may need a low-profile light bar that clears the roofline and reduces wind noise. A heavy pickup can support larger driving lamps, but suspension movement still needs clearance. For motorcycles, narrow flood beams improve side visibility without adding excessive handlebar weight.
I have found that beam pattern matters more than raw wattage on rocky trails. A long-range spot beam helps on open desert tracks. It can feel too narrow in dense forest. There, a wide flood or hybrid beam reveals branches, ruts, and animals near the trail edge. Amber light may reduce glare in dust, while neutral white often shows surface texture more clearly. Neither choice works perfectly in every condition.
Terrain should guide mounting height, housing strength, and electrical planning. Muddy routes demand sealed housings, protected connectors, and brackets that resist vibration. Snowy ground can reflect intense light toward the driver. Lower output may improve comfort. Check whether the lamps match the vehicle’s 12-volt or 24-volt system. A relay, fuse, and correctly sized wiring reduce heat and voltage loss. I once focused too heavily on brightness and overlooked water spray from a roof mount. That mistake made the beam hazy and showed why testing matters. Measure the trail, inspect fasteners after a rough trip, and adjust the aim at night.