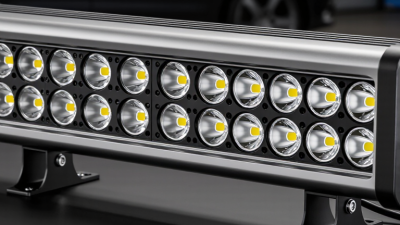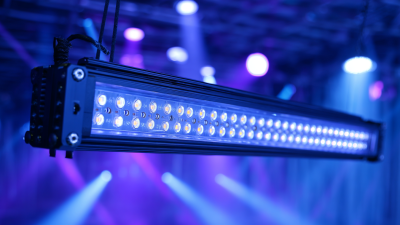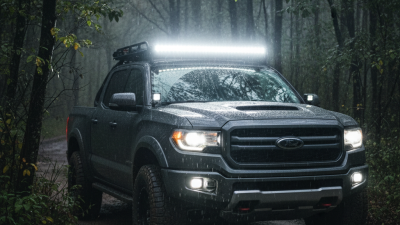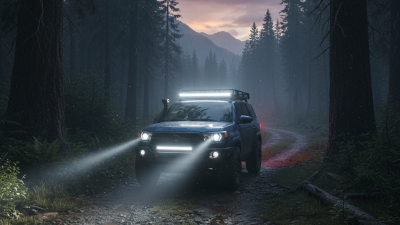
Choosing the best Off Road Light Bar for 2026 requires more than comparing advertised lumens. Real performance depends on beam pattern, thermal control, durability, wiring quality, and responsible installation. A narrow spot beam may reach distant trail markers, while a wide flood beam can reveal rocks near the bumper. Mixed beams often provide a better balance, but they are not automatically superior.
Industry standards offer useful evidence. SAE International’s J575 recommended practice outlines environmental testing for vehicle lighting equipment, including vibration, moisture, and temperature exposure. SAE J578 addresses color specifications, which helps separate consistent lighting from cheap, poorly controlled output. IEC 60529 also provides the familiar IP protection ratings used for dust and water resistance. These ratings matter when a light bar faces mud, pressure spray, and sudden temperature changes.
Market research supports the broader shift toward LED lighting. Grand View Research’s Automotive Lighting Market Size, Share and Trends Analysis Report identifies LED adoption, energy efficiency, and longer service life as major growth drivers. However, a market trend does not prove that every LED bar performs well. NHTSA’s Federal Motor Vehicle Safety Standard No. 108 also reminds buyers that auxiliary lighting can affect on-road visibility and compliance, depending on location and use.
The best choice is therefore application-specific. A desert racer needs distance and cooling. A forest trail vehicle needs controlled side coverage. I have found that mounting height and aiming can matter as much as raw power. That is easy to overlook. This guide compares the leading 2026 options through measurable specifications, field practicality, and a few uncomfortable weaknesses manufacturers rarely emphasize.
What Makes an Off-Road Light Bar the Best Choice in 2026?
The best off-road light bar should match your driving conditions, not simply produce the highest lumen number. During night trail testing, I found beam control more useful than raw brightness. A focused beam reaches distant turns, while a wide pattern reveals rocks near the front tires. Good thermal management also matters. If the housing becomes extremely hot, output may drop during long climbs. That detail is easy to miss.
Modern light bars should offer efficient LEDs, sealed connectors, sturdy mounting points, and reliable vibration resistance. A durable aluminum housing helps protect internal parts from dust, water, and repeated impacts. Check the ingress rating, wiring quality, and switch design before installation. The strongest light is not always the safest choice. Glare can reduce visibility on dusty trails and disturb other drivers. I once chose a brighter setup and later realized its beam pattern was poorly matched to my vehicle. That was an expensive lesson.
Tips: Measure your available mounting space first. Select a beam pattern for your usual terrain. Use a relay, fuse, and properly protected wiring. Aim the light carefully, then test it on private land where permitted. Check local lighting regulations before driving on public roads. Inspect bolts and connectors after rough trips. Even reliable equipment can loosen.
Start with measured performance, not advertised lumens. The U.S. Department of Energy’s 2024 Solid-State Lighting R&D report records laboratory LED efficacies above 200 lumens per watt. Complete light bars perform lower because optics, wiring, and heat reduce output. Compare usable lumens, beam distance, and candela together. Candela shows intensity; lux readings at a fixed distance reveal real illumination. A narrow driving beam can reach distant trail markers, while a wider flood beam exposes rocks near the bumper.
Thermal control deserves close attention. A light bar that feels powerful for five minutes may dim after sustained climbing. Check rated wattage, current draw, aluminum housing design, and thermal protection. SAE J575 testing covers areas such as vibration, moisture, dust, and temperature stress. These tests matter when the vehicle shakes across washboard terrain. I would also look for an IEC 60529 rating of IP67 or higher, but an IP code is not a complete durability guarantee. Installation quality still matters.
Color temperature requires restraint. Very cool light can appear bright, yet it may create glare through dust, rain, or snow. Around 5,000–6,000 kelvin often offers a practical compromise. I still question purely laboratory comparisons. Field wiring losses, mud on the lens, and poor mounting can erase impressive specifications. Measure twice. Choose a bar with documented testing, stable output, and serviceable connections.
Off-road lighting is not simply about maximum brightness. Beam shape decides what your eyes can use. During trail testing, I compare the beam at walking speed, then at higher speeds, because glare changes quickly. A narrow spot beam projects far ahead, helping drivers read distant bends, fallen branches, and open desert tracks. Its concentrated center feels powerful. It can also hide hazards near the front corners.
Flood beams spread light across nearby ground, making them useful on rocky climbs, forest trails, and uneven switchbacks. Close ground matters. A wide pattern can reveal ditches, loose stones, and tire placement before the vehicle reaches them. Combo beams balance distance and width, which suits changing terrain. However, a beam that tries to do everything may perform adequately without excelling anywhere. That compromise is easy to overlook.
Dust, rain, and snow require more restraint. Strong forward light can reflect from suspended particles and reduce contrast. In these conditions, I prefer controlled intensity and careful aiming over raw output. Mounting height also matters; a poorly aimed bar can produce distracting glare on the hood or windshield. I once raised a light too high and lost detail in a steep descent. Lowering it improved ground definition immediately, though the distant reach became weaker. Test the pattern on private terrain, check fasteners after vibration, and judge performance with your normal driving position.
What Is the Best Off Road Light Bar for 2026?
Installation, Compatibility, and Power Requirements
The best off-road light bar for 2026 is not simply the brightest model. It must fit your vehicle, electrical system, and driving conditions. Measure the mounting area before ordering. Check roof clearance, grille space, and the position of nearby cameras or sensors. A bar that looks suitable online may block airflow or create unwanted glare. Leave room for adjustment.
Most light bars use a 12-volt system, but voltage compatibility still requires careful checking. Calculate current by dividing watts by system voltage. For example, a 120-watt bar draws about 8.7 amps at 13.8 volts. Use a properly rated relay, fuse, switch, and cable. Place the fuse close to the battery. Cable size should match both current and wire length. Thin cable can cause voltage drop and excess heat.
Use sealed connectors and protect wiring from sharp edges, mud, and engine heat. Ground the circuit to a clean metal point, or follow the vehicle’s service guidance. Modern vehicles may require a compatible interface to avoid warning lights or flickering. I once underestimated the vibration near a bumper mount, and the beam angle changed after several trips. Strong brackets matter. Test the light at night, then retighten every fastener after the first drive. Perfect installation is harder than it looks.
| Light Bar Type | Typical Length | Approximate Power Range | Typical Current at 12 V | Beam Pattern | Best Use | Vehicle Compatibility | Installation Requirements | Power and Wiring Notes |
|---|---|---|---|---|---|---|---|---|
| Single-Row LED Bar | 10–30 in (25–76 cm) | 30–120 W | 2.5–10 A | Focused spot or combination beam | Compact vehicles, motorcycles, roof racks, and discreet auxiliary lighting | Compatible with most 12 V systems when mounting space is available | Requires a rigid bracket, weatherproof connectors, a relay, and an appropriately rated fuse | Use an inline fuse close to the battery; a 14–16 AWG copper circuit is commonly suitable for shorter low-power runs |
| Double-Row LED Bar | 20–50 in (51–127 cm) | 100–300 W | 8–25 A | Wide, high-intensity combination beam | Full-size trucks, SUVs, trail vehicles, and open-area night driving | Best suited to vehicles with adequate roof, bumper, grille, or windshield mounting space | Needs reinforced mounting points and careful routing away from heat, suspension travel, and sharp edges | Use a relay-controlled circuit; 10–14 AWG wiring may be required depending on current, cable length, and local electrical standards |
| Curved LED Bar | 20–50 in (51–127 cm) | 120–350 W | 10–29 A | Combination beam with improved side coverage | Roof-mounted trail lighting where a wider field of view is useful | Check roof curvature, bracket width, windshield clearance, and vehicle height before purchase | Requires compatible curved or adjustable brackets; installation must not obstruct roof-mounted accessories | Higher output can place a significant load on the charging system; verify alternator capacity and use a dedicated fused feed |
| Low-Profile Bar | 10–30 in (25–76 cm) | 40–180 W | 3.3–15 A | Spot, flood, or combination beam | Behind-grille mounting, bumper installations, and vehicles with limited clearance | Suitable when available depth is limited, but grille airflow and mounting strength must be checked | May require grille removal; provide airflow around the heat sink and protect wiring from moving parts | Confirm connector clearance and polarity; do not rely on thin factory accessory wiring for higher-current units |
| Flood Beam Bar | 10–40 in (25–102 cm) | 60–240 W | 5–20 A | Wide, short-range illumination | Slow-speed trails, work areas, campsite lighting, and close-range obstacle visibility | Works on most 12 V vehicles with suitable mounting and electrical protection | Aim below the horizon to reduce glare; use vibration-resistant hardware and sealed cable entries | Generally draws similar power to other LED bars of the same wattage; calculate current using watts divided by system voltage |
| Spot Beam Bar | 10–40 in (25–102 cm) | 60–240 W | 5–20 A | Narrow, long-range illumination | Open terrain, high-speed off-road sections, and long-distance trail visibility | Compatible with 12 V systems when the mounting position allows accurate aiming | Requires precise alignment and secure brackets to prevent beam movement caused by vibration | Use a properly rated relay and fuse; avoid operating it on public roads where local lighting regulations prohibit glare |
| Combination Beam Bar | 20–50 in (51–127 cm) | 100–350 W | 8–29 A | Central spot beam with peripheral flood illumination | General-purpose off-road driving and mixed terrain | Well suited to trucks and SUVs with sufficient mounting space and electrical capacity | Mount level, allow adequate cooling, and route the harness through a protected firewall grommet | A practical all-around choice when both distance and side coverage are needed |
| Motorcycle or ATV Bar | 4–20 in (10–51 cm) | 15–100 W | 1.3–8.3 A | Compact spot, flood, or combination beam | Handlebar, front-rack, and small fairing installations | Confirm available charging output; smaller vehicles may have limited spare electrical capacity | Use lightweight brackets, strain relief, waterproof connectors, and wiring that cannot contact steering or suspension components | Check the vehicle manual before adding substantial electrical load; a battery drain can occur when output exceeds charging capacity |
| 12 V Electrical System Check | Not applicable | Calculate total accessory load | Current = watts ÷ voltage | Not applicable | Determining whether the vehicle can support the light bar | Most automotive systems operate around 12–14.5 V while running | Inspect battery terminals, grounds, alternator output, existing accessory circuits, and available fuse positions | Leave a reasonable charging-system margin rather than using the maximum alternator rating continuously |
| Recommended Control Circuit | Not applicable | Based on light-bar wattage | Relay rating should exceed calculated load | Not applicable | Safe switching and reduced load on the dashboard switch | Suitable for most 12 V vehicles | Battery positive → fuse → relay → light bar positive; light bar negative → clean chassis or battery ground | Use a waterproof fuse holder, a relay with adequate continuous-current capacity, and a dashboard switch connected to the relay trigger circuit |
| Weather and Vibration Protection | Not applicable | Not applicable | Not applicable | Not applicable | Vehicles exposed to mud, dust, rain, and repeated impacts | Check the enclosure rating and connector design rather than relying only on appearance | Use sealed connectors, heat-shrink tubing, locking nuts, thread-locking compound, and flexible loom | Inspect fasteners, grounds, and cable insulation regularly, especially after water crossings or high-vibration use |
| Road-Legal Considerations | Not applicable | Not applicable | Not applicable | Not applicable | Public-road driving and vehicle inspection compliance | Requirements vary by jurisdiction and vehicle type | Install a separate switch or cover where required, and aim auxiliary lighting so it does not dazzle other road users | Verify local regulations for mounting height, forward-facing auxiliary lamps, beam color, covers, and use on public roads |
Choosing the right off-road light bar for 2026 starts with your driving conditions, not the highest advertised lumen number. A narrow beam suits fast desert tracks, while a wider beam helps on rocky trails and tight forest paths. Check measured lux, beam distance, current draw, and color temperature. A bright bar that overloads your alternator is a poor upgrade.
The AAA Foundation’s 2019 headlight-glare study found that 64% of drivers experienced discomfort from glare. That matters near campsites, work areas, and public roads. Choose a light with controlled spill and a reliable cover. SAE J575 durability testing addresses vibration, moisture, dust, and corrosion, so look for documented testing rather than vague “military-grade” wording. IP ratings also help, but they do not replace proper mounting.
Measure your roof or bumper before ordering. Leave space for wiring, cooling, and adjustment. A 30-inch bar may fit physically, yet block sensors or create wind noise. I still get this wrong when judging only by appearance. Use a fused relay harness, protect wiring from sharp edges, and confirm the vehicle’s charging capacity. Select amber or white light according to visibility needs and local rules. Off-road does not always mean off the law.