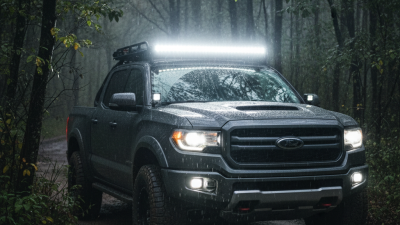
Choosing a Truck With Light Bars is not simply a matter of buying the brightest beam available. A suitable setup must balance visibility, durability, wiring quality, driver comfort, and responsible road use. NHTSA’s 2022 Traffic Safety Facts reported 42,514 traffic fatalities in the United States, reminding drivers that visibility decisions can affect real-world safety. More light is not always safer.
Industry standards provide useful guidance. SAE International publishes lighting practices, including SAE J575 for environmental testing and SAE J581 for auxiliary high-intensity lamps. These references can help buyers examine vibration resistance, moisture protection, thermal performance, and beam control. IIHS headlight evaluations also show that illumination quality varies widely between vehicle systems. A light bar should therefore complement the truck’s existing headlights, not hide their weaknesses.
The seven tips in this guide focus on practical selection. They cover beam pattern, mounting position, weather resistance, power demands, control switches, road-use restrictions, and long-term maintenance. Check the housing after rain. Feel for loose brackets after rough travel. Watch for flickering during engine startup. Small clues matter.
A common mistake is choosing advertised lumens without studying the beam pattern. A narrow spot beam may reach distant trails, while a wide flood beam can better reveal animals, rocks, or work areas nearby. The wrong combination creates glare and dark gaps. That sounds obvious, but many buyers learn it late.
Vehicle height, alternator capacity, and intended terrain also change the decision. Local regulations differ, so confirm permitted colors, mounting heights, covers, and public-road use before installation. Reliable performance comes from measured specifications and careful fitting, not dramatic marketing claims.
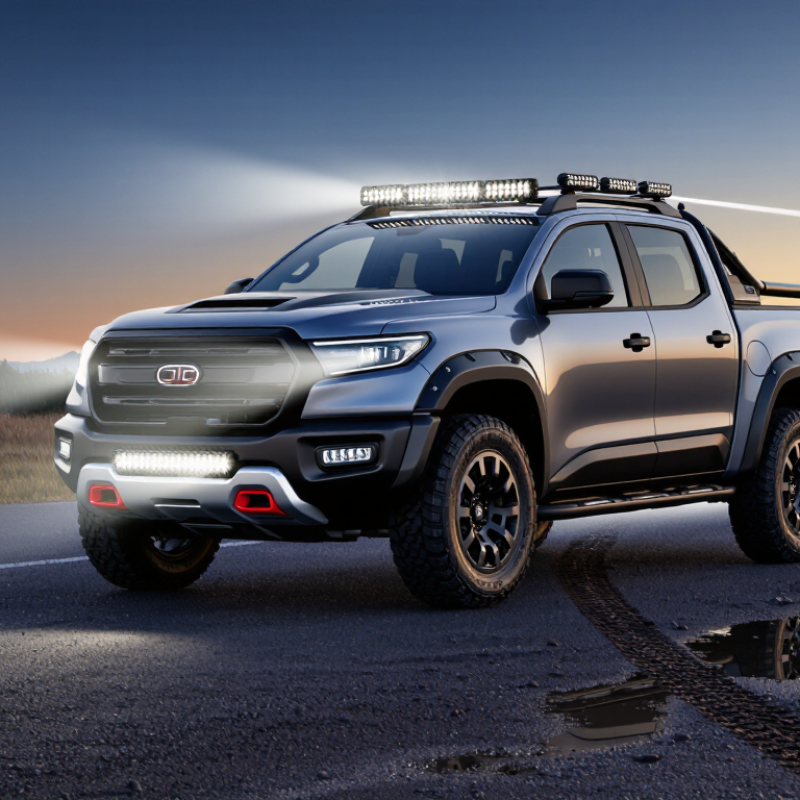
Choosing a truck light bar starts with purpose, not brightness. Define the task, speed, terrain, and weather first. A low-mounted bar for slow trail work needs a different beam than a roof-mounted unit for remote inspection. Use a wide flood pattern near obstacles. Choose a focused spot pattern when distance matters. The brightest option is often the wrong option. Excess output can reflect from dust, snow, or rain, reducing contrast and tiring the driver. NHTSA’s Traffic Safety Facts 2022 reports that roughly 46% of traffic fatalities occurred in dark conditions. Controlled forward lighting deserves careful planning.
Record operating conditions before selecting equipment. Salt, mud, vibration, and frequent washdowns can quickly expose weak sealing or poor mounting. Check the ingress-protection rating, connector design, heat management, and bracket strength. SAE J575 covers durability testing, while SAE J595 addresses auxiliary and warning lamp performance. Testing compliance helps, but it does not guarantee field suitability. A 240-watt bar draws about 20 amps at 12 volts, before system losses. Leave electrical and thermal headroom. For public-road use, confirm beam color, aiming, mounting height, and switching requirements with local authorities. A practical night test matters more than a catalog photograph. A beam may look powerful in a dry yard, yet wash out a pale trail in fog. Recheck alignment after vibration. That small step is easy to overlook.
Compare Light Bar Types, Beam Patterns, and Brightness Levels
Tip 1: Match the light bar type to your driving needs. A straight bar usually offers predictable coverage and simpler installation. Curved bars can follow a truck’s roofline, but mounting space may become limited. Single-row designs look cleaner, while double-row models often produce stronger output. Check the brackets carefully. Vibration can loosen poorly fitted hardware.
Tip 2: Choose the beam pattern based on terrain. Spot beams project a narrow, long-distance path for open roads. Flood beams spread light across nearby ground, which helps during slow work or off-road turns. Combo patterns join both effects. In my testing, combo beams felt useful, but their center hotspot sometimes left weaker side coverage. That detail is easy to miss.
Tip 3: Compare brightness beyond advertised lumens. High lumen numbers do not guarantee useful visibility. Look for beam distance, lux readings, lens quality, and power consumption. Excessive glare can reflect from dust, rain, or snow and reduce contrast. More light is not always better. A balanced output often feels safer and less tiring.
Tip 4: Inspect the color temperature and controls. Neutral white light can reveal surface changes without appearing overly harsh. Confirm that wiring, fuses, and switches suit the truck’s electrical system. I once underestimated current draw and needed a better fuse setup. Review local road-use requirements before installation, since some light settings may be restricted in public traffic.
7 Tips for Choosing a Truck With Light Bars
Check your truck’s compatibility before comparing brightness or beam distance. Confirm the light bar suits your vehicle’s voltage system and mounting area. Measure the available space near the grille, roof, or bumper. Leave room for brackets, wiring, and airflow. A bar that barely fits may vibrate against the body. It happened to me once. The installation worked, but the constant rattle became irritating.
Choose a secure mounting surface, not just a convenient one. Use hardware designed for outdoor vibration and inspect the mounting points for corrosion. Think about the beam pattern and driving conditions, because wider light is not always better. Calculate the total wattage before installation. Check the alternator, battery capacity, fuse rating, relay, and wire gauge. Keep wiring away from sharp edges and hot engine parts. Add weatherproof connectors where moisture may collect. Test the system at night, then recheck the bolts after several trips. Small movement matters.
Do not ignore height, visibility, or local road-use requirements. Some areas restrict auxiliary lighting on public roads, even when the equipment is professionally installed. Verify the rules before using the lights outside private property. Also consider service access. A perfectly sealed installation can become frustrating when replacing a fuse requires removing half the grille. Measure twice. Plan the power route before drilling.
How to read this chart: Estimated current is calculated from the light bar’s rated power at a nominal 12-volt vehicle electrical system using the formula current = watts ÷ volts. Actual readings may vary with system voltage, wiring, and operating temperature.
Tip 1: Check the beam pattern before buying. A bright light can still create dangerous glare when aimed incorrectly. NHTSA reports that nearly half of traffic fatalities occur at night, despite less nighttime travel. Visibility matters, but control matters more.
Tip 2: Choose a housing with tested ingress protection. An IP67 rating indicates dust protection and temporary water immersion resistance under IEC 60529 testing. It does not guarantee survival after every pressure wash. Tip 3: Inspect the lens, seals, brackets, and wiring. Look for UV-resistant materials and corrosion protection, especially near coastal roads. Tip 4: Match the light bar to the truck’s electrical system. SAE J575 includes laboratory tests for vibration, moisture, dust, corrosion, and thermal cycling. Certification is useful evidence, not a promise of perfect field performance.
Tip 5: Review local lighting laws before installation. Requirements may control mounting height, color, beam direction, daytime use, and covering on public roads. Rules differ between regions, and online advice can be outdated. Tip 6: Keep auxiliary beams away from mirrors and sightlines. Use a properly rated fuse, sealed connectors, and protected cable routing. Tip 7: Test the installation after rain, vibration, and temperature changes. My checklist is not flawless; a professional inspection can catch loose mounts or excessive glare. Record the light’s test rating, wiring layout, and legal approval documents. That small file may prevent confusion during inspection or resale.
| Tip | Evaluation Area | Recommended Specification | Why It Matters | Practical Check | Typical Risk if Overlooked |
|---|---|---|---|---|---|
| 1 | Prioritize Weather Resistance | Choose a sealed light bar with an IP67 or higher enclosure rating. | IP67-rated equipment is dust-tight and designed to withstand temporary immersion in water up to the limits specified by the manufacturer. | Look for a clearly stated IP rating and inspect the lens, housing, cable entry points, and gaskets for continuous sealing. | Water intrusion, internal corrosion, condensation, and intermittent operation. |
| 2 | Assess Housing Durability | Use a corrosion-resistant aluminum housing with a polycarbonate or similarly impact-resistant lens. | Aluminum helps transfer heat and reduce weight, while a strong lens helps resist stones, road debris, and minor impacts. | Check for uniform wall thickness, protected fasteners, secure end caps, and a lens without visible flexing or gaps. | Cracked lenses, loose components, premature corrosion, or heat-related failure. |
| 3 | Verify Vibration Resistance | Select a unit designed for vehicle use with reinforced mounting points and hardware suitable for the truck’s surface. | Off-road travel, rough pavement, and engine vibration can loosen brackets and damage wiring over time. | Prefer rigid brackets with locking hardware; use rubber isolation washers where recommended and recheck fasteners after installation. | Aim misalignment, rattling, cracked mounts, or disconnected wiring. |
| 4 | Match Beam Pattern to the Task | Use a spot beam for long-distance visibility, a flood beam for near-field coverage, or a combination beam for mixed driving conditions. | Beam shape affects usable visibility more than advertised lumen output alone. | Compare beam diagrams, mounting height, road speed, and the area that must be illuminated before selecting the pattern. | Glare, dark areas, poor distance visibility, or unnecessary light spill. |
| 5 | Check Electrical Compatibility | Confirm the vehicle voltage, current draw, fuse rating, relay capacity, wire gauge, and switch rating before installation. | A correctly sized circuit reduces voltage drop, overheating, nuisance fuse failures, and battery or alternator strain. | Calculate current using watts ÷ system voltage, then provide appropriate circuit protection close to the power source. | Dim output, overheated wiring, blown fuses, or electrical damage. |
| 6 | Review Legal and Lighting Rules | Verify local rules for color, mounting height, number of lamps, aiming, brightness, activation, and use on public roads. | Auxiliary lighting requirements differ by country, state, province, and municipality. Off-road approval does not automatically mean road-legal approval. | Check the applicable vehicle code or transportation authority guidance. Use covers, separate controls, or approved operating modes when required. | Traffic citations, inspection failure, visibility hazards, or liability after a collision. |
| 7 | Consider Maintenance and Support | Choose replaceable mounting hardware, accessible connectors, clear installation instructions, and a documented warranty or service process. | Routine inspection and easy access can extend service life and reduce downtime in harsh environments. | Confirm connector availability, spare fasteners, cleaning requirements, warranty terms, and whether the light can be serviced without replacing the entire assembly. | Longer downtime, difficult repairs, recurring water ingress, or higher ownership cost. |
A realistic budget should cover more than the light bar itself. Include wiring, a fuse, mounting brackets, a relay, and professional installation if needed. I once underestimated these costs and delayed the project for weeks. That mistake taught me to leave room for replacement parts and unexpected fitting problems. A cheaper light bar can become expensive when its connectors corrode or its mount vibrates loose.
Choose a reliable brand by checking its warranty, published specifications, and customer service history. Look for clear details about beam pattern, power draw, weather resistance, and operating temperature. An IP rating can indicate protection from dust and water, but it does not guarantee perfect installation. Read reviews from truck owners who use similar roads and weather conditions. Real experience often reveals weak brackets or poor seals.
Check the bar’s electrical demand against your truck’s system before buying. A product that looks powerful may overload an unsuitable circuit. Use properly rated wiring and secure every connection away from heat and moving parts. Also verify local lighting rules before driving on public roads. I would not rely on a dramatic advertisement alone. Some claims sound impressive but lack testing details. A trusted seller should provide responsive support, honest specifications, and replacement parts when problems appear.