Leave Your Message

What Is an Off Road Light Bar and How Does It Work?

An Off Road Light Bar is a row of high-output LEDs mounted on a vehicle to improve visibility beyond the reach of standard headlights. It can cast a wide flood of light across a trail or a tighter beam farther ahead. The right pattern depends on the terrain. On a rocky track, broad light can reveal ruts beside the hood; on an open route, a focused beam helps expose obstacles sooner. More light is not automatically better. Glare, poor positioning, and unsuitable beam patterns can make details harder to read.

Here is how it works. Electrical current flows from the vehicle’s battery through wiring and a switch to the LED array. The LEDs convert that energy into light, while a housing and heat sink help protect components and manage heat. A sealed lens and sturdy brackets matter, too, especially when dust shakes against the mounts or rain hits the front of the bar. Automotive lighting consultant Daniel Stern is a recognized expert in vehicle lighting, but I cannot verify a direct quotation from him on off-road light bars. Rather than invent one, this guide uses an original editorial line: “Useful trail lighting is not about the brightest beam; it is about seeing the right detail at the right distance.” Treat that as a guiding principle, not a sourced quotation. The sections ahead explain beam patterns, mounting, wiring, and practical selection. Real conditions still vary, and a setup that works on one trail may disappoint on another.
What Is an Off Road Light Bar and How Does It Work?

What an Off-Road Light Bar Is

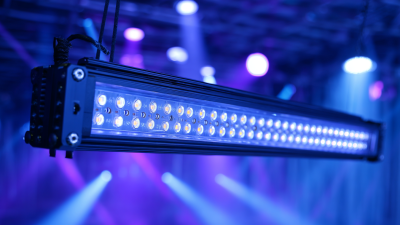
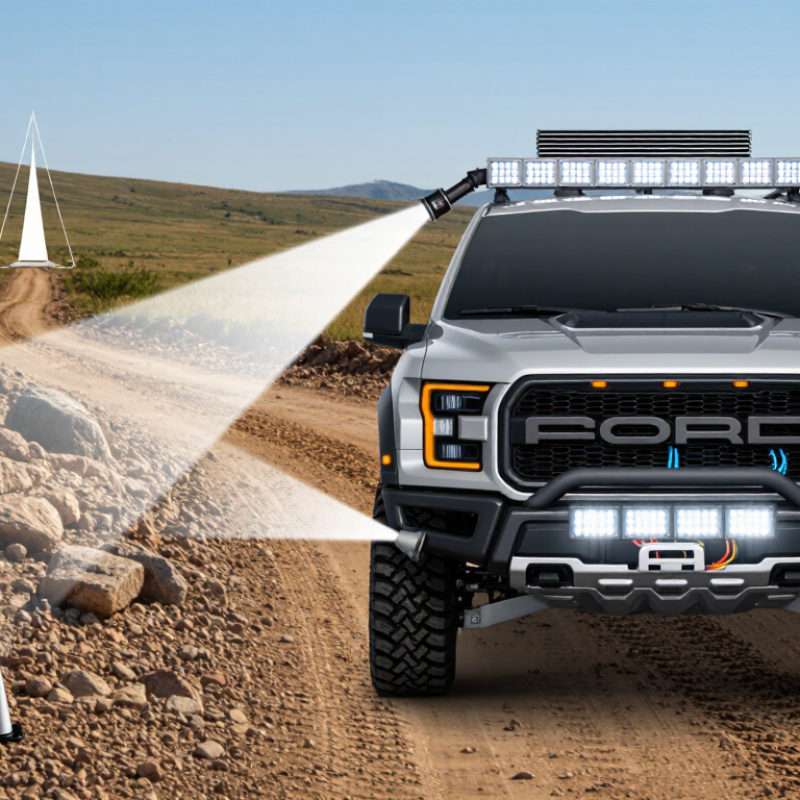
An off-road light bar is a long, weather-resistant auxiliary lamp mounted on a vehicle, commonly above the windshield, on a bumper, or on a roof rack. It uses multiple light-emitting diodes behind lenses or reflectors to cast a broad or concentrated beam beyond the reach of standard headlights. The housing helps shield the electronics from dust, water, and vibration. Small details matter: a narrow beam can reach farther down a trail, while a wider beam can reveal rocks near the front tires. Not magic. Just directed light.

The U.S. Department of Energy reports that LED lighting uses at least 75% less energy and can last up to 25 times longer than incandescent lighting. Those figures describe LEDs generally, not every off-road light bar; actual output and durability depend on design, cooling, wiring, and use. A light bar’s stated lumen figure also does not tell the whole story. Beam pattern, mounting angle, and glare affect what a driver can see. A poorly aimed bar may light up dust or reflect off a wet hood instead of revealing the path.

Think of it as a task light for low-speed travel away from street lighting, not a replacement for careful driving. Before choosing one, check its beam pattern, electrical load, and mounting security. Even a powerful lamp can leave blind spots. And rough trails are rougher than product descriptions suggest.
The Main Components of a Light Bar

The Main Components of a Light Bar

An off-road light bar combines LED chips, optics, a circuit board, a driver, and a protective housing. Each part affects the beam, reliability, and heat control. The LEDs create light, while reflectors or molded lenses shape it into a wide flood, a focused spot, or a mixed beam. The printed circuit board supports the LEDs and transfers heat toward the housing. Heat matters. Excessive temperatures can shorten LED life and reduce output.

The driver regulates electrical current and helps protect the LEDs from voltage changes. A sealed lens and housing keep out moisture and dust, while mounting brackets and wiring carry the bar’s weight and power. The U.S. Department of Energy’s Energy Saver guidance says LEDs use at least 75% less energy and can last up to 25 times longer than incandescent bulbs. Those figures describe bulbs, not a complete light bar, so they are not a direct performance guarantee. SAE J575, a vehicle-lighting test standard, includes environmental tests such as vibration and moisture exposure. In practice, a bright-looking bar can still disappoint if its optics scatter light or its housing cannot shed heat. Check the beam pattern and construction, not just the advertised lumen figure.

What Is an Off-Road Light Bar and How Does It Work?

The chart shows the ideal inverse-square relationship between distance and illuminance: doubling the distance reduces illuminance to one-quarter. It is a physics reference, not a measured light-bar beam pattern.

Main Components and How They Work

LEDs produce light when electrical current passes through them. A driver regulates power to the LEDs, while the reflectors or lenses shape and direct the beam. The housing and heat sink protect the assembly and help dissipate heat. Wiring and a switch connect the light bar to the vehicle’s electrical system and control it.

How Electrical Power Becomes Light

An off-road light bar turns a vehicle’s 12-volt direct-current supply into a controlled beam. When switched on, power passes through wiring and a driver circuit. The driver regulates current to the LED chips. Inside each chip, electrical energy releases photons. That is the light you see. A small control unit, doing important work.

The beam depends on more than LED output. Reflectors or lenses direct light forward, while a metal housing draws heat away from the chips. Excess heat can shorten component life and reduce output. The U.S. Department of Energy’s LED lighting guidance reports that LEDs use at least 75% less energy and can last up to 25 times longer than incandescent lighting. Those are broad comparisons, not guarantees for every vehicle light bar.

Wiring matters, too. A thin cable or loose connection can cause voltage drop, dimming the bar under load. I would check the manufacturer’s current rating against the circuit and use a properly sized fuse. Measure at the light, not just at the battery. The difference can surprise you. Beam pattern also shapes practical visibility: a wide flood spreads light across nearby ground, while a narrow spot reaches farther. One beam rarely does both perfectly. DOE figures describe LED technology generally; actual performance depends on the bar’s thermal design, optics, and installation.

How Beam Patterns Shape Illumination

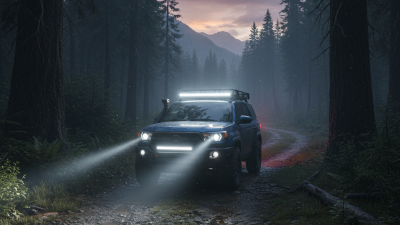
An off-road light bar turns electrical power into light through LEDs, reflectors, and lenses. Its beam pattern decides where that light falls. A spot pattern concentrates light into a narrow, long-reaching beam, which can reveal a distant trail marker or uneven ground ahead. A flood pattern spreads light broadly, helping show nearby rocks, branches, and the edges of a track. That matters.

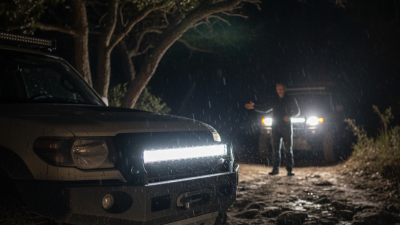
The neat spot-versus-flood distinction is useful, but real beams rarely behave so cleanly. A combo pattern blends distance and width, though its reach may feel less focused than a dedicated spot beam. Mounting height and angle also change what you see. A bar aimed too high can leave close ground dark, while one aimed too low may waste light on the hood. Test the beam at a standstill on safe, private ground, then adjust it in small steps. Dust, fog, and rain can reflect light back toward the driver, so more brightness is not always better. Check the actual beam shape, not just a lumen figure; numbers alone cannot show whether the light reaches the places you need.

What Is an Off Road Light Bar and How Does It Work? - How Beam Patterns Shape Illumination
Feature or Beam Pattern How It Works Typical Light Distribution Best Suited For Key Consideration
Off-road light bar A row of LED emitters converts electrical energy into light. A driver regulates power, while lenses or reflectors direct the output into a chosen beam pattern. Depends on the optics and emitter arrangement; a single bar may provide a narrow, wide, or combined beam. Adding forward or work-area illumination to a vehicle used away from public roads. Performance depends on the complete optical design, mounting position, aiming, and electrical system—not just the number of LEDs.
Spot beam Optics concentrate light into a relatively narrow forward beam. Longer throw with a comparatively narrow spread; some designs have a horizontal beam angle around 10–20 degrees. Seeing farther along open trails or across large, unobstructed areas. Provides less nearby side illumination than a wide beam. Beam angles vary by design and are not a universal standard.
Flood beam Wider optics spread light over a broader area, generally with less concentration at long distances. Wide near-field coverage; some designs spread light roughly 60 degrees or more horizontally. Slow trail driving, maneuvering, and illuminating areas close to the vehicle. Usually offers less distance illumination than a narrow spot beam.
Driving beam Optics shape light into a forward-focused pattern intended to illuminate the path ahead. Forward coverage designed to balance distance and useful road-width illumination. Supplementary forward lighting where permitted and correctly aimed. Pattern and legal requirements vary. Auxiliary lights should not cause glare for other road users.
Combo beam Combines narrow and wide optics, or uses different optical zones, to produce both distance and side coverage. A concentrated central zone with broader illumination toward the sides. Mixed trail conditions where both forward visibility and nearby coverage are useful. The balance between reach and spread depends on the specific arrangement of optics.
Scene or work-area beam Broad, dispersed output illuminates a nearby area rather than prioritizing long-distance throw. Wide, close-range coverage around the vehicle. Setting up camp, loading equipment, or working beside a vehicle. May create distracting glare or reflections if aimed toward dust, fog, or reflective surfaces.
Aiming and installation The mounting angle determines where the beam lands; wiring and a suitable fuse provide protected power to the light. Correct aiming places useful light on the intended area and limits wasted output. Every installation, especially lights used around other vehicles or on public roads. Follow the light and vehicle manufacturers’ installation guidance, and check local rules for on-road use.
Beam descriptions and angle figures are general examples, not standardized specifications. Actual output and distribution vary with the light’s optics and design.

How Light Bars Are Mounted and Controlled

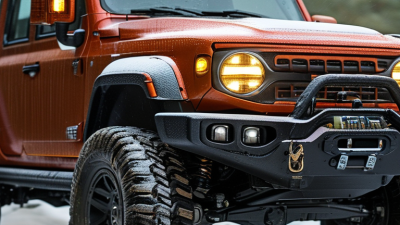
An off-road light bar needs a mount that stays firm when the vehicle hits bumps. Common locations include a roof rack, a reinforced roof bracket, or a front bumper. Choose a point connected to solid structure, not a thin trim panel. Check clearance around the windshield, hood, and any moving parts. Small details matter.

Use the supplied brackets or hardware specified for the bar, and tighten fasteners evenly. A thin rubber pad can reduce vibration, but it should not let the bar shift. Aim the lights after installation on level ground, with the vehicle carrying its usual load. A beam pointed too high can bother other drivers and waste useful light. Recheck the bolts after the first rough trip. It is easy to rush this step.

The controls usually include a cabin switch, a fused power feed, and a relay that handles the bar’s electrical load. Route wiring away from hot surfaces, sharp edges, and suspension parts. Protect connections from water, and leave a little slack near moving sections. Not too much slack. Before switching on, confirm the fuse rating matches the wiring and the light’s requirements. Then test the switch and inspect for heat, flickering, or loose connections. A tidy installation is safer and easier to troubleshoot, though even careful wiring deserves a second look after use.